

Monday, May 9, 2011
Check out our facebook page for more updated information about vertical gardening. http://www.facebook.com/#!/pages/A-Knot-in-Thyme/145158798843981.


Thursday, September 23, 2010
Things Learned This Year
So now as the season is closing I want to share some of the things that I learned this year about The Vertical Garden. You may ask, what else could be learned about vertical gardening? Didn't you do the same as you did last year? Actually, no! We tried many new plants and designs this year and that is what I would like to focus on.
PLANTS:
Some of the new plants we tried were:
(* indicates it was a real winner!)
Nemesia
Kale, Red Chidori- Beautiful color! Goes to seed quicker than Redbor.
Impatiens*- This really turned out nicely. Nice and Compact.
Creeping Charlie*- Splended display! We chose the variegated and planted it on the end.
Bacopa*- beautiful! Really filled out with gorgeous color!
Mauve Thyme*- very compact and colorful
Bidens- Tended to be leggy and not very compact.
A few facts we learned:
1: When you are planting Pansies or Violas you need to be aware of what is planted directly above them. If it is something that will shade them you will end up with extremely leggy pansies.
2: Apply Slug Bait frequently! The slugs can be your worst enemy. Although we didn't have any issues the first year, this year we found they made their dwelling behind the typar, making our lovely plants their dinner!
3: Whatever you plant in the top of the wall must be draught tolerant. I have discovered that Nasturtium are very thirsty plants and while we consistently watered through the top of the wall we still ended up with very puny Nasturtium.
4: Sweet Peas are not the #1 choice for the arch. They are very prone to Powdery Mildew and don't keep their "prettiness" very long. I am hoping to research another option for our arch.
5: It's important to constantly check that plants are not shading their neighbors unnecessarily.
I am sure I will think of other learned concepts but this is what I have for now. Questions? Comments? Let me know.
(Photos courtesy of covegirl79.blogspot.com , Carolyn Pivarnik) 


Thursday, September 16, 2010
Build Your Own Vertical Garden!
Perhaps one of those most frequently asked questions about the Vertical Garden is how it was built. A practical question and one I intend to answer in this post. Keep in mind that all of this can be done on a much smaller scale to accomodate whatever size VG you wish to build.
Let's start with the materials. You will need:
Hog Paneling
Chicken Wire
Shade Cloth (Typar)
Long wire?
Post to support the Wall
Cement to set the posts in
The Process:
1: Decide where you will put your Vertical Garden and flatten the ground. Be attentive to how much sun each side gets as that will determine what you plant.
2: Dig the holes and pour the cement for your wooden posts. Pound in the T-posts at the point where your sides will be held in place. It is very important that you ensure the stability of your structure. A wall full of heavy dirt could be a dangerous thing to have topple over.
3: Construct the "sides" of your wall. If you leave the ends of the hog wire with extra sticking out you can hook the chicken wire onto the hogwire making it more secure. It might be a good idea to wire the ends just for extra measure. You next step is to attach the shade cloth.
4: Wire three sides of the wall to the T-Posts leaving an opening to do your inside work.
5: Insert "cross braces" cut from the hogwire, starting at one end and working your way back toward the opening. Wire to each side of the wall. Before you put in each "cross brace" you will need to do some major wiring in between the two sides. You really can't do too much. The idea is to work your way from one end of the wall to the other. This will keep the wall from bowing as it gets heavy.
6: Wire the end onto your wall and install your irigation system. Fill with dirt. (Be sure to water BEFORE you plant so the dirt can settle.)
I hope this helps all of you aspiring Vertical Gardeners. If there are any details that you are unsure about feel free to email us or call. (aknotinthyme@verizon.net, 360-240-1216)
Let's start with the materials. You will need:
Hog Paneling
Chicken Wire
Shade Cloth (Typar)
Long wire?
Post to support the Wall
Cement to set the posts in
The Process:
1: Decide where you will put your Vertical Garden and flatten the ground. Be attentive to how much sun each side gets as that will determine what you plant.
2: Dig the holes and pour the cement for your wooden posts. Pound in the T-posts at the point where your sides will be held in place. It is very important that you ensure the stability of your structure. A wall full of heavy dirt could be a dangerous thing to have topple over.
3: Construct the "sides" of your wall. If you leave the ends of the hog wire with extra sticking out you can hook the chicken wire onto the hogwire making it more secure. It might be a good idea to wire the ends just for extra measure. You next step is to attach the shade cloth.
4: Wire three sides of the wall to the T-Posts leaving an opening to do your inside work.
5: Insert "cross braces" cut from the hogwire, starting at one end and working your way back toward the opening. Wire to each side of the wall. Before you put in each "cross brace" you will need to do some major wiring in between the two sides. You really can't do too much. The idea is to work your way from one end of the wall to the other. This will keep the wall from bowing as it gets heavy.
6: Wire the end onto your wall and install your irigation system. Fill with dirt. (Be sure to water BEFORE you plant so the dirt can settle.)
I hope this helps all of you aspiring Vertical Gardeners. If there are any details that you are unsure about feel free to email us or call. (aknotinthyme@verizon.net, 360-240-1216)


Wednesday, July 21, 2010
Update in Pictures
Gazania

Progress on the Rose Garden

'Tuscan Sun' Rose

'Warm Side' of the Parterre

'Cool Side' of the Parterre

Brightly Colored Ice Plants

Gaillardia 'Fanfare'

Osteospermum


Saturday, May 29, 2010
A Garden....and a City!
While working in the garden earlier today we realized that there is indeed ANOTHER nest INSIDE the wall!! It is nestled very cozily up inside one of the holes left over from last year. Mr. Rawls stuck his hand inside and said he felt eggs! How fun to have more than one bird find our Vertical Garden as a nice home. I enlisted my little brother to help me get this picture and as we turned back the flaps the bird flew out!!! It scared me half to death and I think we both jumped about a foot!! We will be leaving the nest there, at least until the eggs are gone and we don't see any sign of the bird. Who knows! Maybe the birds will tell all of their friends and next spring we will have a little city living in our wall! :-)


Thursday, May 20, 2010
A Garden and A Home
This past week I have been spending a lot of time in front of The Wall planting this season's designs. So exciting!! It's really coming together nicely and I can't wait to see it all filled out and blooming. As I was working on one section of the wall I observed that last year's Parsley has finally decided to go to seed. It was rather large and drooped a good bit on top of another plant. It took some maneuvering to remove it, but as I pulled it out I found a bird's nest nestled underneath where the parsley had been!! How interesting! I don't know what kind of bird it was for, but I am pleased to know that The Wall can be used for more than just growing flowers and vegetables. :-)

Friday, April 30, 2010
First planting of 2010!
Yesterday was my first planting in the Wall in 2010! It was a very exciting occasion. I planted Bacopa, Lobelia, Calibrachoa in alternating patterns. Then today I planted three different varieties of lettuce (Italienischer, Flashy Trout's Back and Dazzle) in a slanted pattern. It will be great when it really fills out! As of right now they are rather small.


There has been a lot of progress at the farm recently and it keeps us all on our toes. The new garden this year is the Rose Garden. It is going to spectacular! There will be over 50 different varieties of roses to look forward to. As of right now there are a little stressed. They were just transplanted from a spot that they've been happily growing for several years. They are still adjusting. :-) It was not the ideal time to transplant but due to circumstances we didn't have much of a choice. We'll just have to see how they do! They won't bloom soon but maybe by July we'll see some of those beautiful flowers. The garden is still in construction so I'll keep you posted with pictures as it comes along.
The Parterre is almost completely planted. YAY! It is nice to have that garden "under my belt" and to be able to focus on other things. There is a lot going on but it is really exciting! I still never get over the thrill of watching things grow and bloom into beautiful flowers and veggies!
This is the Lobelia that I planted yesterday. It's already growing upward!

My favorite tools: Sturdy gloves, pruners, trowel, Sharp wire cutters, razor knife, and a pencil to edit my plans. :-)

I know it's not the BEST quality of picture but I just loved this little Viola that volunteered itself in the pathway. It's so tiny and so cute!

New plants....Bacopa, Calibrachoa, and Lobelia. (This was before I planted the lettuce. More pictures of that later)

Thursday, April 15, 2010
For Sale....
Transplanting is on the brain right now as we move everything from their cell trays into 4" pots. Thousands of plants have been transplanted, and there is more to go! Most, if not all, of the vegetables we have planted we are selling. This is our second year building up the nursery and it has truly been a success! Earlier this spring we had many people ask when our vegetable starts would be available. They raved about the quality of our plants and couldn't wait to get more this year. It just thrilled me to hear that! So far we have Lettuce, Cabbage, Broccoli, Cauliflower, Spinach, Chinese Cabbage, Mustard, and more. We carry many varieties of each of these. Although our plants were healthy last year, I think they have improved this year! We have taken extra care to transplant them before they are stunted from being in a pot that is too small. It's a lot of work, but definitely worth it. I will let the pictures speak for themselves...


Color Bowls with Violas and tulips

Spinach, Regal Hybrid

Various Lettuce Plants....we have a lot!

Cabbage, many varieties.
Go here to check out our new spring website!
Monday, March 8, 2010
Starting the Seeds.
The past few weeks have been filled with planting seeds for the coming year. It is certainly fun to imagine the marvelous flowers and veggies these miniscule seeds will produce in the future. Oh, how I look forward to that time! I have not counted, but we have planted approximately 100 trays (each tray holds 50-75 seeds), and have MANY more to plant. A lot of them are the old time favorites: Lettuce, Cabbage, Broccoli, etc. But we've planted many flowers as well.
One of my favorite parts of gardening is watching the little plants pop their heads out of the soil for the first time! It seems like every time I check I discover a new little friend saying "hello" to the world. It's so fun!
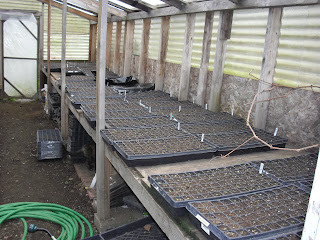

One of my favorite parts of gardening is watching the little plants pop their heads out of the soil for the first time! It seems like every time I check I discover a new little friend saying "hello" to the world. It's so fun!
The majority of the trays have sprouted and I look forward to seeing what else has come up tomorrow. However, being plants, they grow and need further attention; that is what my focus will be over the next few weeks, and really the rest of the season. I look foward to sharing all that we have planned for this summer. It should be a wonderful year! I plan to write a lot more about the other gardens this year. There is just so much to share and we have so many beautiful gardens at the farm. Here's just a glimpse of what's been going on with the seeds....


Thursday, January 28, 2010
Welcome, Spring?
Well, I have been silent for some time but it hasn't been without reason. There just simply hasn't been anything to write about. Winter is winter, and things die. It is unfortunate but true. However, it seems as if Whidbey Island has decided to make an early jump to spring. The temperatures have been in the 50's and many of the plants are already coming back! In my mind, it's almost spring. Granted, things could change and we could get a sudden freeze, but it's hard to imagine when I am outside without even a sweater. :-)
Inspired by this warm weather, I have taken to cleaning the gardens, the Wall included. It now has a fresh face lift. I am VERY pleased with how the perennials have come back! I wasn't sure how they would survive the winter in the odd conditions of the Vertical Garden, but they have proven to be very hardy. Some of the perennials starting to show new growth are : Marjarom, Thyme, Oregano, Pansies, Mimulus, Pentunias, and more!
I made a list of seeds to order for The Vertical Garden 2010. We will take our knowledge gained from last year's experiment and apply it to this year. It should make quite a difference. I can't wait to see how the Wall is transformed this year!
Inspired by this warm weather, I have taken to cleaning the gardens, the Wall included. It now has a fresh face lift. I am VERY pleased with how the perennials have come back! I wasn't sure how they would survive the winter in the odd conditions of the Vertical Garden, but they have proven to be very hardy. Some of the perennials starting to show new growth are : Marjarom, Thyme, Oregano, Pansies, Mimulus, Pentunias, and more!
I made a list of seeds to order for The Vertical Garden 2010. We will take our knowledge gained from last year's experiment and apply it to this year. It should make quite a difference. I can't wait to see how the Wall is transformed this year!
Wednesday, October 14, 2009
Frequently Asked Questions
I apologize for my delay in posting. Things at the farm have been quite busy with the hustle and bustle of the annual Whidbey Island Farm Tour. But I now have time to sit down and write. :-)
So many people have asked me questions about the wall. I thought it might be useful to post these questions. Perhaps they would answer some questions YOU may have. Feel free to leave any comments or questions you have that were not answered.
Q: What is the wall built of?
A: The structure of the wall is built of three things: posts to support the wall, wire (hogwire and chicken wire), and Typar. The posts were cemented several feet into the ground to support the large structure. On each side of the posts, a foot apart, the sides of the wall were erected. After the sides were thoroughly wired to the posts and to each other, the wall was filled dirt.
Q: How do you plant in the wall?
A: It is very simple to plant in the wall. You need three basic tools: a razor knife, a shovel, and wire cutters. I would recommend wearing gardening gloves because the wires can be rough on the hands. Simply cut the wires and bend them back making ample room for whatever you are planting. Then slit the Typar the appropriate size. Shovel out the dirt and gently place your plant inside. Within a few days your plant will begin to grow skyward. It is very exciting to see watch it grow up!
Q: How long did it take to plant the wall?
A: There are two walls at the farm, each is planted on both sides. It took me approximately 8 hours to plant each side. Keep in mind there were probably hundreds of plants for each side. Because there are more steps than normal gardening it does take longer. But it is well worth the effort when you see your final result!
Q: Is it possible to make a smaller version of your Vertical Garden?
A: Yes! It is very feasible to make a small Vertical Garden for those who don't have enough space or time. You could even build a small cube with the primary goal of growing salad greens. The possibilities are endless!
Q: What kind of things grow well on the Vertical Garden?
A: I found SO many things that grow well, particularly salad greens. Any sort of mustard, lettuce, kale, pac choi, etc. does exceedingly well. I have grown many herbs (Thyme, Marjoram, Oregano, Parsley) and flowers. Petunias are perhaps the best flowers to plant in the wall. They do a great job of covering and flowing. Any climbing vines or flowers are fabulous! I haven't experimented AS much with vegetables, but tomatoes have done great, as well as Chard.
Q: How do you fertilize?
A: I have found it easiest to use liquid fertilizer (MiracleGro) and to pour small amounts into each hole using a watering can.
Q: How do you water?
A: We have placed a soaker hose at the top of the wall. Actually, I have found that the wall very rarely dries out. Because it is shaded it stays very wet. The top foot or so dries out but the soaker hose does a good job at watering that. As I plant I water them in to keep them from going into too much shock.
I think that covers the questions I am asked most often. Like I said, please ask any questions you may have. This IS experimental so I cannot garantee that I can answer everything. :-) We are also at the end of the season so there won't be a lot to post about between now and spring. But I am eagerly anticipating the planning for next year's Vertical Garden!
I was able to harvest some salad greens from the wall this past week. What fun!


So many people have asked me questions about the wall. I thought it might be useful to post these questions. Perhaps they would answer some questions YOU may have. Feel free to leave any comments or questions you have that were not answered.
Q: What is the wall built of?
A: The structure of the wall is built of three things: posts to support the wall, wire (hogwire and chicken wire), and Typar. The posts were cemented several feet into the ground to support the large structure. On each side of the posts, a foot apart, the sides of the wall were erected. After the sides were thoroughly wired to the posts and to each other, the wall was filled dirt.
Q: How do you plant in the wall?
A: It is very simple to plant in the wall. You need three basic tools: a razor knife, a shovel, and wire cutters. I would recommend wearing gardening gloves because the wires can be rough on the hands. Simply cut the wires and bend them back making ample room for whatever you are planting. Then slit the Typar the appropriate size. Shovel out the dirt and gently place your plant inside. Within a few days your plant will begin to grow skyward. It is very exciting to see watch it grow up!
Q: How long did it take to plant the wall?
A: There are two walls at the farm, each is planted on both sides. It took me approximately 8 hours to plant each side. Keep in mind there were probably hundreds of plants for each side. Because there are more steps than normal gardening it does take longer. But it is well worth the effort when you see your final result!
Q: Is it possible to make a smaller version of your Vertical Garden?
A: Yes! It is very feasible to make a small Vertical Garden for those who don't have enough space or time. You could even build a small cube with the primary goal of growing salad greens. The possibilities are endless!
Q: What kind of things grow well on the Vertical Garden?
A: I found SO many things that grow well, particularly salad greens. Any sort of mustard, lettuce, kale, pac choi, etc. does exceedingly well. I have grown many herbs (Thyme, Marjoram, Oregano, Parsley) and flowers. Petunias are perhaps the best flowers to plant in the wall. They do a great job of covering and flowing. Any climbing vines or flowers are fabulous! I haven't experimented AS much with vegetables, but tomatoes have done great, as well as Chard.
Q: How do you fertilize?
A: I have found it easiest to use liquid fertilizer (MiracleGro) and to pour small amounts into each hole using a watering can.
Q: How do you water?
A: We have placed a soaker hose at the top of the wall. Actually, I have found that the wall very rarely dries out. Because it is shaded it stays very wet. The top foot or so dries out but the soaker hose does a good job at watering that. As I plant I water them in to keep them from going into too much shock.
I think that covers the questions I am asked most often. Like I said, please ask any questions you may have. This IS experimental so I cannot garantee that I can answer everything. :-) We are also at the end of the season so there won't be a lot to post about between now and spring. But I am eagerly anticipating the planning for next year's Vertical Garden!
I was able to harvest some salad greens from the wall this past week. What fun!
Thursday, August 6, 2009
Replacement time!
So now comes the fun part....replacing things that have gone to seed! In my last post I mentioned that although lettuce does great in the wall, it has to be replanted after a while. Today we took out the lettuce that I planted during that first week. Some of it is almost as tall as I am! It seemed really bare after we were done but it was nice to get it all cleaned up. I planted more lettuce since it seems to love the conditions of the wall so much. It really thrives!
So while we were pulling out the old lettuce we realized an issue. Naturally over time the outer leaves of lettuce brown and rot. However, since the lettuce grows up and against the wall the leaves rot faster. If you don't take away the rotten leaves it will spread quickly. So we have just realized that we need to constantly be checking for leaves that are rotting between the lettuce and the wall.
I am beginning to formulate a plan in my head for next year. It's difficult to decide between really interesting things and plants that fill out and cover. Maybe I will do a combination. I suppose I have all winter to think about it! I really like the practicality of the wall. It can be very useful for planting vegetables and herbs. My desire is for it to be a practical display garden; a garden that produces salad greens, parsley, kale, etc. in a way that is attractive and unique. And of course flowers are a must!
I have said it before, and I will say it again, I am open and asking for any suggestions that anyone might have. While I have learned A LOT this year about vertical gardening, I would still love to hear other ideas. Please leave a comment and enjoy the pictures!

So while we were pulling out the old lettuce we realized an issue. Naturally over time the outer leaves of lettuce brown and rot. However, since the lettuce grows up and against the wall the leaves rot faster. If you don't take away the rotten leaves it will spread quickly. So we have just realized that we need to constantly be checking for leaves that are rotting between the lettuce and the wall.
I am beginning to formulate a plan in my head for next year. It's difficult to decide between really interesting things and plants that fill out and cover. Maybe I will do a combination. I suppose I have all winter to think about it! I really like the practicality of the wall. It can be very useful for planting vegetables and herbs. My desire is for it to be a practical display garden; a garden that produces salad greens, parsley, kale, etc. in a way that is attractive and unique. And of course flowers are a must!
I have said it before, and I will say it again, I am open and asking for any suggestions that anyone might have. While I have learned A LOT this year about vertical gardening, I would still love to hear other ideas. Please leave a comment and enjoy the pictures!
Linnea was deadheading the pansies while Mrs. Rawls and
I were discussing next year's plans for the wall. Me
Me
Me
Linnea, Me and Mrs. Rawls
Friday, July 10, 2009
Almost done...
I finished Wall #4 yesterday! Well...almost. I have about 1 1/2 rows still to do. But it is so nice to see it really shaping up. So for this wall Mrs. Rawls suggested the I do vertical rows. It was a fabulous idea! In the wall, things naturally grow up so they should easily keep their vertical lines.
I did a brief inventory in my mind of what we had and what could go in the wall. A lot of what I was planning to use several weeks ago has now been planted in other places. But that's ok. I was still able to work with what we had. Last year all of the Alyssum that we planted in the Quilted Garden went to seed and we were blessed with an abundance of it this year. It didn't exactly flow with the design so we dug it up and repotted it. It's been a lifesaver! It works very well in the wall and we have plenty. :-)
I have discovered that Thyme is fabulous in the wall! It just grows right up and fills out. It's been amazing to watch how fast things grow in the wall. On Wednesday I planted some Thyme and Petunias. When I went into work on Thursday morning they had already started to grow up! I couldn't believe it! I am looking forward to seeing what it will be like by next week! Also...we have tomatoes growing!
Until next time.... Wall #4

The strawberries almost reach the ground!!!


Friday, July 3, 2009
Update!
Ok so it's been a while since I posted anything about how the gardens are doing. Part of it is because I haven't actually seen the gardens in a while with so much other stuff going on. But between yesterday and this morning I was able to really evaluate them and get some good pics. Unfortunately I haven't had a chance to do any actual gardening in a while.
It has been very hard to keep things wet with the dry spell we've had, so I have to say that, in spite of the "draught", things are doing very well! The wall is really starting to fill out! The only drawback is that some things have gone to seed and I haven't had time to replace them. The Joi Choi and Mustard have both gone to seed and I suspect the lettuce will soon. No worries! But do keep in mind if you ever choose to plant these things in your wall (if you decide to take on such a challenge) that you will need to plan for succession plants. You may decide against it because it would have to be replanted several times a year. That is why we chose against an entire wall of lettuce. Could you imagine planting a wall of lettuce three times each year?! Talk about time consuming!
I think my favorite part of the wall right now is the pansies in the walkway. They are all blooming right now and are so beautiful! I also started on my next wall. However, you only get a small glimpse of what it will be like. (Just because it's not done yet. ;-) But I hope to finish that this week. I think that's all I have for now. I plan to do another update soon when I have spent more time working with my hands. :-)
It has been very hard to keep things wet with the dry spell we've had, so I have to say that, in spite of the "draught", things are doing very well! The wall is really starting to fill out! The only drawback is that some things have gone to seed and I haven't had time to replace them. The Joi Choi and Mustard have both gone to seed and I suspect the lettuce will soon. No worries! But do keep in mind if you ever choose to plant these things in your wall (if you decide to take on such a challenge) that you will need to plan for succession plants. You may decide against it because it would have to be replanted several times a year. That is why we chose against an entire wall of lettuce. Could you imagine planting a wall of lettuce three times each year?! Talk about time consuming!
I think my favorite part of the wall right now is the pansies in the walkway. They are all blooming right now and are so beautiful! I also started on my next wall. However, you only get a small glimpse of what it will be like. (Just because it's not done yet. ;-) But I hope to finish that this week. I think that's all I have for now. I plan to do another update soon when I have spent more time working with my hands. :-)
The Warm Side
The Cool Side

Wall #1

Wall #2

Pansy Arch

Wall #3

Wall #4 (A glimpse of what's to come.)

Subscribe to:
Posts (Atom)